Running SSL on localhost without going mad

I admit it, this title is a little clickbaity. Have you tried to setup SLL for your local dev environment lately? Does it make you want to bang your head against a wall? Then this article might be for you, I battle tested this on different laptops, and it served me well. Let’s be clear, this is superfluous, and most of the times it’s unnecessary. You can probably live without using SSL/HTTPS for your local dev, but sometimes you may want to be able to do just that, because your work environment requires it, for consistency with what runs on the cloud, or to secure a little communications with external services.
How it works
If you use your favorite search engine, you might be tempted to use Let’s Encrypt to do that. Don’t do it, unless you control the domain you want to generate a wildcard certificate for, and you are willing to renew the certificate every 3 month. Yes, you can automate it, but is it worth it? Maybe, it’s up to you to decide.
One of the alternative solution proposed by Let’s Encrypt, is to generate yourself a certificate, either self-signed or signed by a local root, and trust it in your operating system’s trust store. Not great. First because you have to play with OpenSSL , and you have to deal with the burden of adding the certificates into the different browsers, and making your operating system trust it. Depending on the OS / distribution, you might loose your hair, as little as you still got (speaking by experience). Been there, done that, not for me.
Enter mkcert
This tool has saved my sanity.
What is mkcert ? Let me answer by shamelessly quote their GitHub page:
mkcert is a simple tool for making locally-trusted development certificates. It requires no configuration.
That sounds good, right? It is, but you have to install first the tool on your machine. It is well explained on mkcert’s page.
With the help of two small commands you can generate an SSL certificate, automatically trusted by the system, and by the browsers (Chrome and Firefox, better than nothing).
Generate and install the root CA certificate:
$ mkcert -install
Created a new local CA at "/Users/jeremie/Library/Application Support/mkcert" 💥
The local CA is now installed in the system trust store! ⚡️
The local CA is now installed in the Firefox trust store (requires browser restart)! 🦊
The last line is important, don’t forget to restart your web browsers after this command.
Then, generate certificates for your local domain, you can give it a list of domain names (space separated):
$ mkcert demainilpleut.local "*.demainilpleut.local" localhost 127.0.0.1 ::1
Using the local CA at "/Users/jeremie/Library/Application Support/mkcert" ✨

Created a new certificate valid for the following names 📜
 - "demainilpleut.local"
 - "*.demainilpleut.local"
 - "localhost"
 - "127.0.0.1"
 - "::1"

The certificate is at "./demainilpleut.local+4.pem" and the key at "./demainilpleut.local+4-key.pem" ✅
The public and private key should be generated in the current path your were when you executed the command.
Testing the installation
Before going further, we will have to make sure your /etc/hosts file has a record for the domains you want to use, mine is for the demainilpleut.local domain, edit the file and add a new line for that:
127.0.0.1 demainilpleut.local
Now we will want to add those certificates into the config of our local web server. Below are some examples for nginx, Apache, and Jekyll. I believe that if you search on your favorite search engine for other servers, you will find one that suit your need.
Nginx
Create or modify the server configuration, mine is located in /etc/nginx/conf.d/demainilpleut.conf.
# cat /etc/nginx/conf.d/demainilpleut.conf
server {
   listen 80;
   server_name demainilpleut.local;
   root /var/www/demainilpleut;
}

server {
   listen *:443 ssl http2;
   root /var/www/demainilpleut;
   server_name demainilpleut.local;
   ssl_certificate /home/jveillet/demainilpleut.local+4.pem;
   ssl_certificate_key /home/jveillet/demainilpleut.local+4-key.pem;
}
Apache
The first step is to enable the SSL module for Apache (needs to only be done once).
sudo a2enmod ssl
Next, create an Apache configuration file (or copy-paste an existing one).
<IfModule mod_ssl.c>
    <VirtualHost _default_:443>
        ServerName demainilpleut.local
        ServerAdmin admin@demainilpleut.local

        DocumentRoot /var/www/demainilpleut

        <Directory "/var/www/demainilpleut">
            Order allow,deny
            Allow from all
            AllowOverride all
            Require all granted
        </Directory>

        ErrorLog ${APACHE_LOG_DIR}/localsite-error.log
        CustomLog ${APACHE_LOG_DIR}/localsite-access.log combined

        SSLEngine on

        SSLCertificateFile  /home/jveillet/demainilpleut.local+4.pem
        SSLCertificateKeyFile /home/jveillet/demainilpleut.local+4-key.pem

        <FilesMatch "\.(cgi|shtml|phtml|php)$">
                SSLOptions +StdEnvVars
        </FilesMatch>
        <Directory /usr/lib/cgi-bin>
                SSLOptions +StdEnvVars
        </Directory>

    </VirtualHost>
</IfModule>
Jekyll
To use the certificates, we need to modify the way we launch Jekyll via the command line.
For clarity purpose, I have moved the files into a /.config/ssl folder of my project.
jekyll serve --ssl-key .config/ssl/demainilpleut.local+4-key.pem --ssl-cert .config/ssl/demainilpleut.local+4.pem
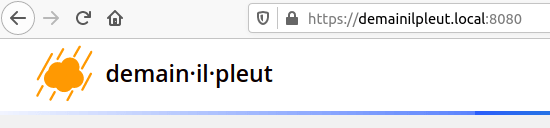
Final result
🎉️